
Posted August 8, 2025 by Martin
Combining 3d printing, precision cardboard cutting, and tabletop roleplaying
I’m a sucker for a good map. Having a visual representation of whatever world of make-believe I’m sending my players to helps me get immersed in the story I’m spinning, and it helps my players place themselves in the proper context.
The thing about maps, though, is that they tend to give away either too much, or too little. If your GM rolled out a map of the region spoiling every single location, I imagine you wouldn’t be amused. Likewise, a completely featureless map wouldn’t be much use either. Sure, you can annotate the map as you play, but there’s got to be a better way.
I’m currently preparing for a Fallout TTRPG campaign that I’ll be running later in the year using the excellent 2D20 system from Modiphius. One of my design goals for this campaign was that I wanted to emulate how you gradually uncover the world map as you explore the region. The solution I arrived at is a modular world map using both 3d-printed parts and custom, double-sided cardboard game tiles. Here’s how I made this.
My Cricut has quickly become one of my favorite roleplaying tools. If you’re unfamiliar, Cricut is a line of precision cutting machines that can cut paper, vinyl, and many other materials. It also cuts chipboard, which is perfect for making game pieces. I have a Maker 3, and in the past I’ve used it to make hexagon tiles for the Dune TTRPG campaign I was running.
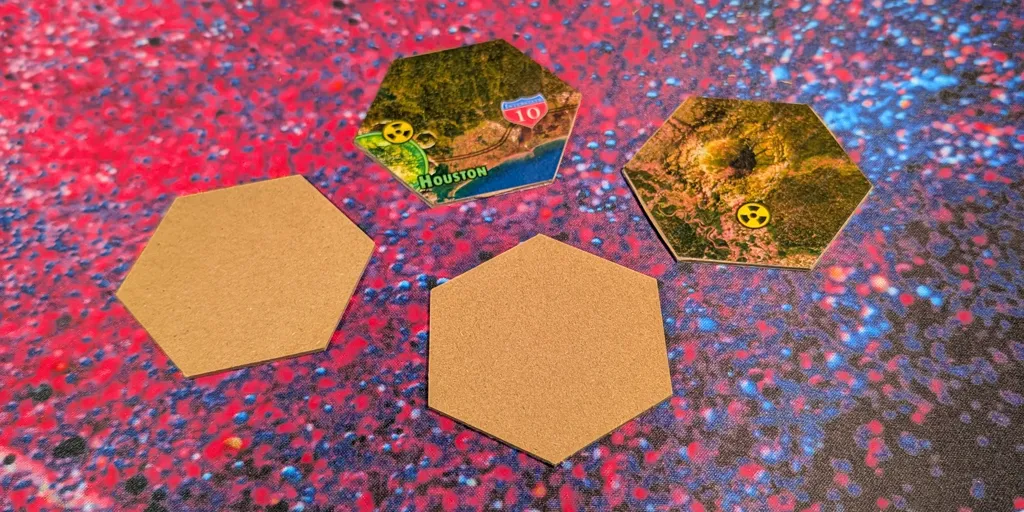
One of the materials the Cricut can process is sticker paper. You can design stickers in the Cricut software, print them on sticker paper, then feed the paper into your machine to cut out the stickers. Once I had a stack of blank chipboard hexagons (61, to be precise), I then made stickers for each individual tile by taking the world map I’d created and cutting it into 61 individual hexagons. With each hexagon having an “unexplored” and an “explored” side, that’s 122 stickers!
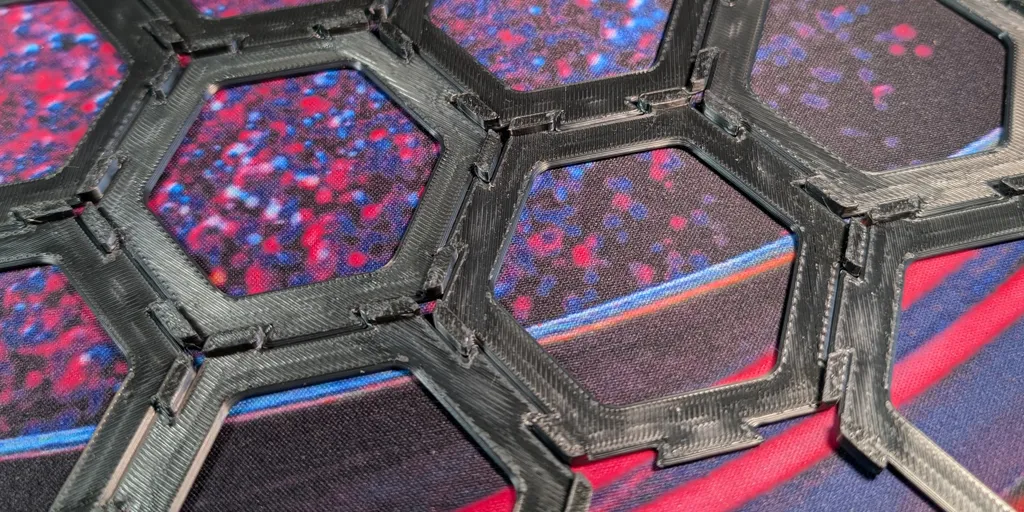
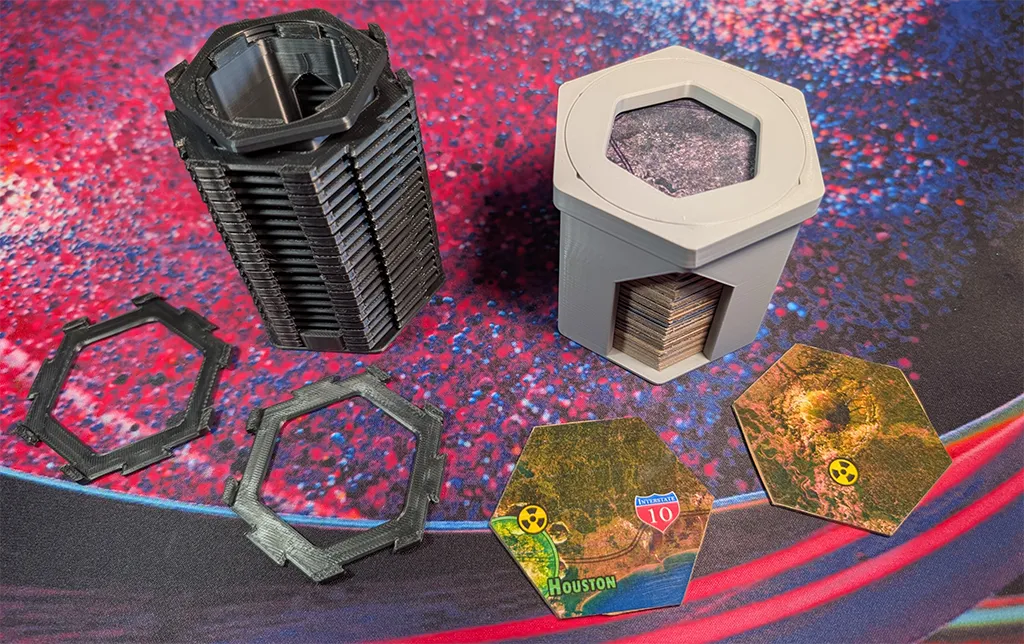
To keep the hexagon tiles in place, I designed interlocking, 3d-printed hexagon tile holders. I had to get the measurements for the gap between tiles just right; jumping between a 3d-printing workflow and a sticker-printing workflow was a challenge, but I think the results turned out great.
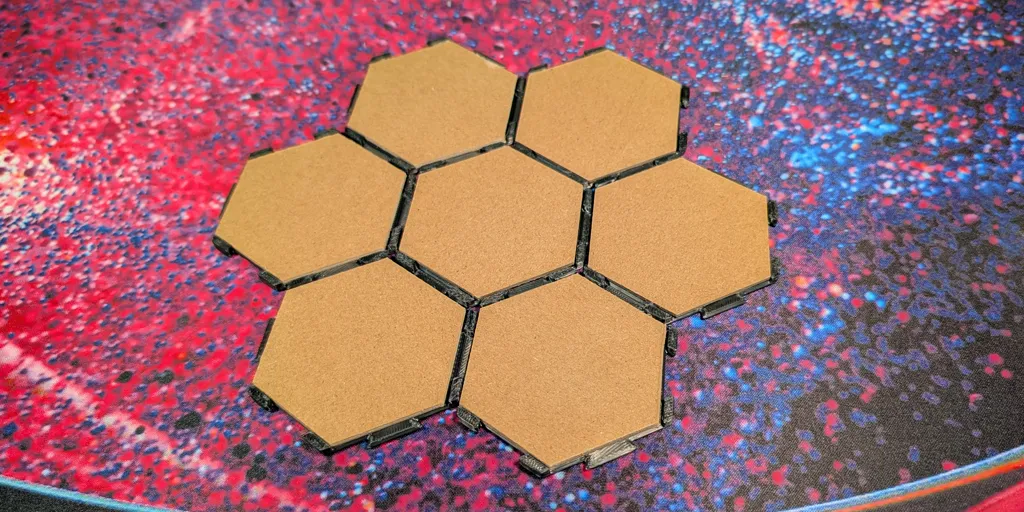
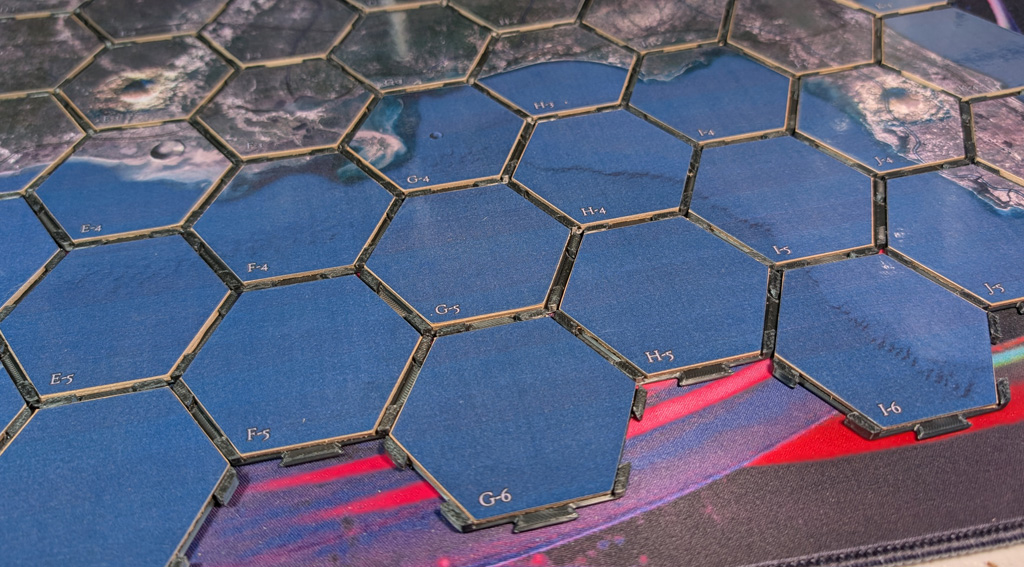
With the stickers done and the hexagon tile holders printed, here’s what the final map’s unexplored side looks like:
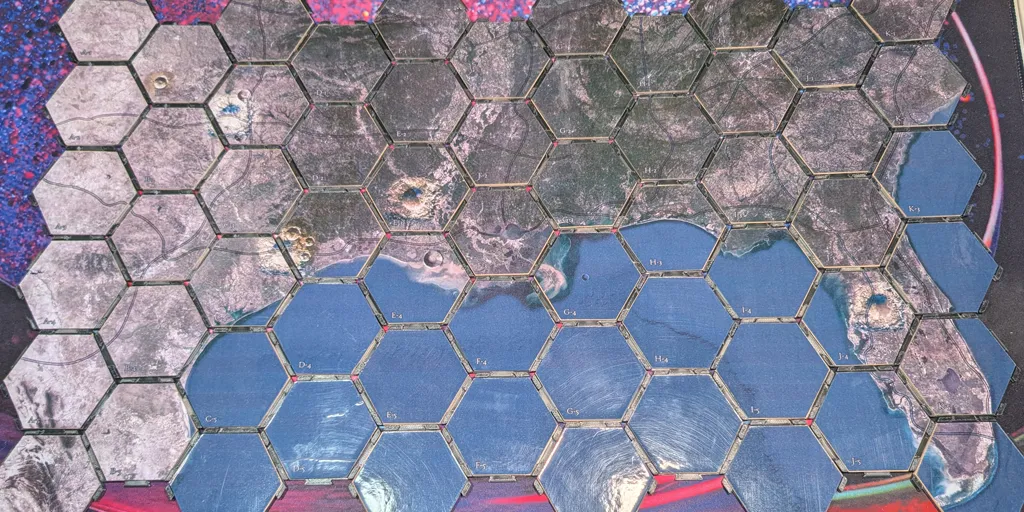
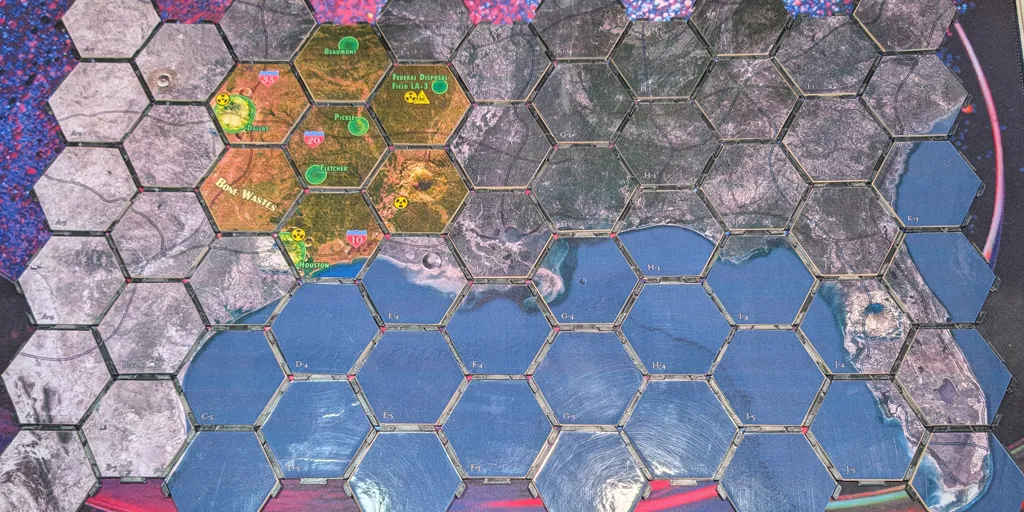
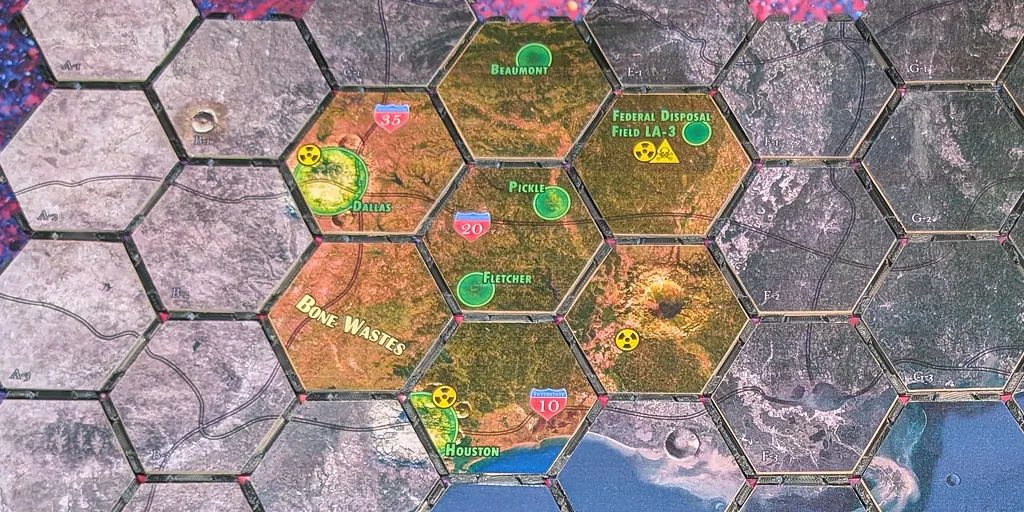
It’s big! A nice side-effect of the modular design is that I can always extend the map outward in case my players decide they want to go beyond where the bulk of the campaign will take place. As they explore, they get to flip over new tiles, which looks like this:
My final requirement for this project was that I wanted the components to setup and store easily. As anyone with a 3d printer will tell you, printing storage solutions accounts for about 90% of printing projects, and that’s only mildly exaggerated. What I came up with is a fairly straightforward system that uses screw-on caps to hold things in place.
Here’s what my workspace looks like in Photoshop:
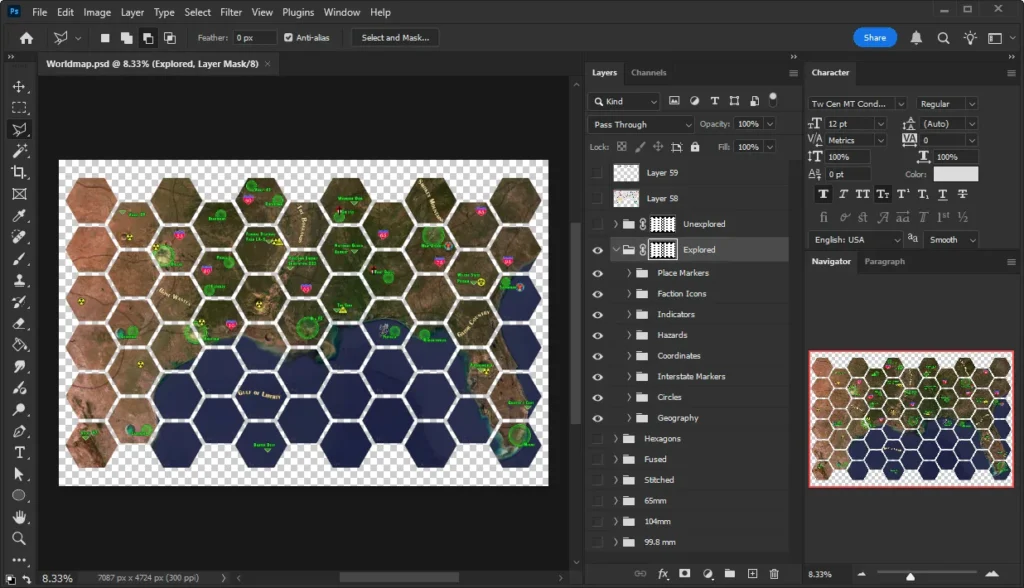
To create the basic map, I stitched together a whole lot of satellite images of the gulf. I then applied a layer mask to the map group to break it into appropriate-sized hexagons, with the gaps between hexes sized to match the 3d-printed parts. After that, all I had to do was add in all the different map markers I needed, like Points of Interest, Hazards, Location Markers, and so on.
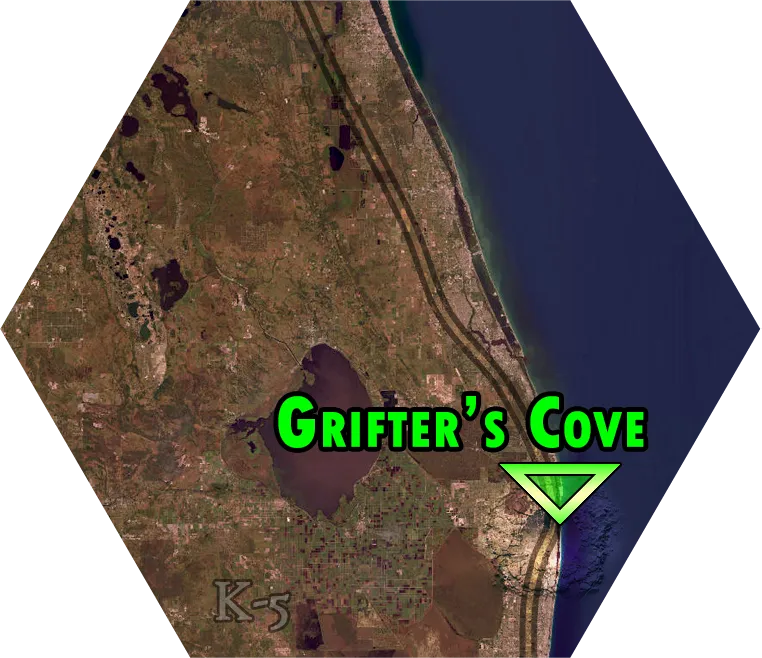
The last step was copying individual hexagons and then turning those into stickers in the Cricut software. You see an example of what those sticker images look like on the right.
If you want to build your own world map, you can download the .STL and Blender source files now. This archive also includes an image you can use as a mask in your image editing software of choice.
The big question I have is this: Can I adapt this mapmaking method to also create modular combat encounter maps? I have some ideas on how I might go about doing that; stay tuned!
Happy mapping!